The original idea was to use a Thomson computer to fit in a smaller computer, such as a CHIP or Raspberry Pi, but the software update support would have been difficult, the use limited to the builtin programs, and it would have required a separate screen. So I restricted myself to only making a keyboard. It was a big enough task, as we'll see.
How do keyboards work?
Loads of switches, that's how. I'll point you to Michał Trybus' blog post « How to make a keyboard - the matrix » for details on this works. You'll just need to remember that most of the keyboards present in those older computers have no support for xKRO, and that the micro-controller we'll be using already has the necessary pull-up resistors builtin.
The keyboard hardware
I chose the smallest Thomson computer available for my project, the MO5. I could have used a stand-alone keyboard, but would have lost all the charm of it (it just looks like a PC keyboard), some other computers have much bigger form factors, to include cartridge, cassette or floppy disk readers.
The DCMoto emulator's website includes tons of documentation, including technical documentation explaining the inner workings of each one of the chipsets on the mainboard. In one of those manuals, you'll find this page:

Whoot! The keyboard matrix in details, no need for us to discover it with a multimeter.

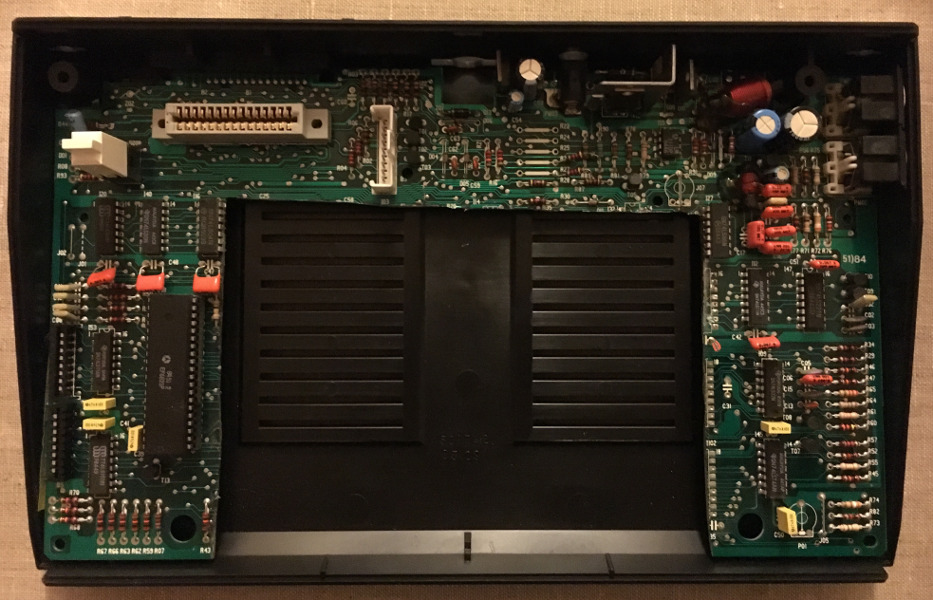
That needs a wash in soapy water
After opening up the computer, and eventually giving the internals, and the keyboard especially if it has mechanical keys, a good clean, we'll need to see how the keyboard is connected.

Finicky metal covered plastic

Desoldered connectors
After matching the physical connectors to the rows and columns in the matrix, using a multimeter and a few key presses, we now know which connector pin corresponds to which connector on the matrix. We can start soldering.
The micro-controller
The micro-controller in my case is a Teensy 2.0, an Atmel AVR-based micro-controller with a very useful firmware that makes it very very difficult to brick. You can either press the little button on the board itself to upload new firmware, or wire it to an external momentary switch. The funny thing is that the Atmega32U4 is 16 times faster than the original CPU (yeah, we're getting old).
I chose to wire it to the "Initial. Prog" ("Reset") button on the keyboard, so as to make it easy to upload new firmware. To do this, I needed to cut a few traces coming out of the physical switch on the board, to avoid interferences from components on the board, using a tile cutter. This is completely optional, and if you're only going to use firmware that you already know at least somewhat works, you can set a key combo to go into firmware upload mode in the firmware. We'll get back to that later.
As far as connecting and soldering to the pins, we can use any I/O pins we want, except D6, which is connected to the board's LED. Note that any deviation from the pinout used in your firmware, you'd need to make changes to it. We'll come back to that again in a minute.
The soldering

Colorful tinning
I wanted to keep the external ports full, so it didn't look like there were holes in the case, but there was enough headroom inside the case to fit the original board, the teensy and pins on the board. That makes it easy to rewire in case of error. You could also dremel (yes, used as a verb) a hole in the board.
As always, make sure early that things would fit, especially the cables!
The unnecessary pollution
The firmware
Fairly early on during my research, I found the TMK keyboard firmware, as well as very well written forum post with detailed explanations on how to modify an existing firmware for your own uses.
This is what I used to modify the firmware for the gh60 keyboard for my own use. You can see here a step-by-step example, implementing the modifications in the same order as the forum post.
Once you've followed the steps, you'll need to compile the firmware. Fedora ships with the necessary packages, so it's a simple:
sudo dnf install -y avr-libc avr-binutils avr-gcc
I also compiled and installed in my $PATH the teensy_cli firmware uploader, and fixed up the udev rules. And after a "make teensy" and a button press...
It worked first time! This is a good time to verify that all the keys work, and you don't see doubled-up letters because of short circuits in your setup. I had 2 wires touching, and one column that just didn't work.
I also prepared a stand-alone repository, with a firmware that uses the tmk_core from the tmk firmware, instead of modifying an existing one.
Some advices
This isn't the first time I hacked on hardware, but I'll repeat some old adages, and advices, because I rarely heed those warnings, and I regret...
- Don't forget the size, length and non-flexibility of cables in your design
- Plan ahead when you're going to cut or otherwise modify hardware, because you might regret it later
- Use breadboard cables and pins to connect things, if you have the room
- Don't hotglue until you've tested and retested and are sure you're not going to make more modifications
Finishing touches

All Sugru'ed up
To finish things off nicely, I used Sugru to stick the USB cable, out of the machine, in place. And as earlier, it will avoid having an opening onto the internals.
There are a couple more things that I'll need to finish up before delivery. First, the keymap I have chosen in the firmware only works when a US keymap is selected. I'll need to make a keymap for Linux, possibly hard-coding it. I will also need to create a Windows keymap for my father to use (yep, genealogy software on Linux isn't quite up-to-par).

Prototype and final hardware
All this will happen in the aforementioned repository. And if you ever make your own keyboard, I'm happy to merge in changes to this repository with documentation for your Speccy, C64, or Amstrad CPC hacks.
(If somebody wants to buy me a Sega keyboard, I'll gladly work on a non-destructive adapter. Get in touch :)